Showing posts with label decorations. Show all posts

October 17, 2013

Before & After

Considering the fact that my "baby" is now almost 16 months old I thought it might be good to finally get some pictures of his room transformation. I figure that in the next few years it will change into a 'big-boy' room, so I wanted to make sure to document his nursery before anything changes.
 *   *   *
I will admit...looking at the before pictures of his room, both Jason and I questioned why we bought our house in the first place...it needed some work and love that's for sure.
BEFORE

Blake's room was the first room in the house we wanted to make sure we got started on and finished...you can tell by my painting pictures that little Blake was going to be coming soon. :)  If you have ever been pregnant and 'nested,' you know that this room might have been enough to send you over the edge.  Eventually though we got it all done...not before he arrived though, since someone decided to come three-weeks early.

We literally ended up re-doing everything in the room. From new outlets, floor and window molding, carpet and paint, we worked hard to transform this dingy room into one that our sweet little boy could grow to love.

Painting the Stripes:
Step 1: Tape out the correct widths for the stripes.
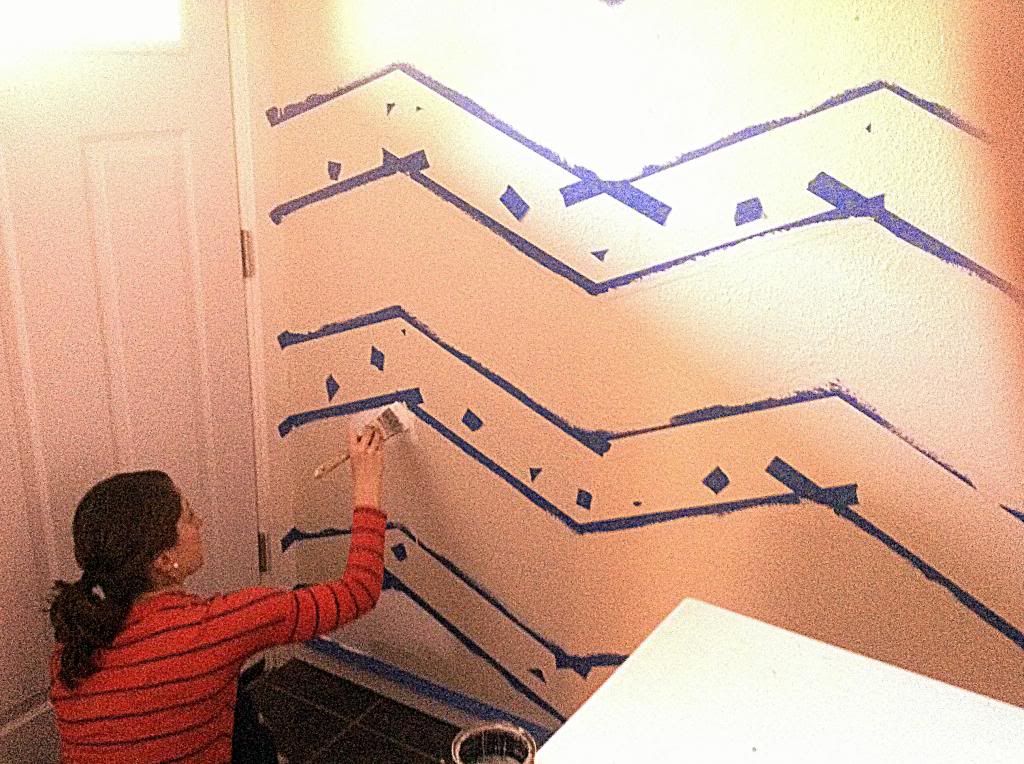
Step 2: Use the original base color (gray) paint, and paint over the tape side you are going to paint the new color (white). (See this step in the picture) This step seals the tape line, so that when you remove the tape after painting you have a crisp line with little touch-ups needed. Amazing time saver!
Step 3: Then paint the white on the other stripes. After it dries, touch up the paint and carefully peal off the tape.
Building the window-seat was one of our goals for the spot in front of the window. Thankfully Jason's dad was able to help make it happen. I love this special touch to his room.
AFTER

Blake's favorite place in his room...Reading books and snuggling in the rocking chair.

February 18, 2013

Chevron Entry.

 I am in LOVE with the chevron. I didn't know where, but I decided about a month ago that I wanted to paint some wall in our house with this pattern that has become so popular. After searching through Pinterest for the best method, I chose to tackle the feat of taping out and painting a chevron on our entry wall.
Total cost of this project, $0 since we had the paint sitting in the garage. :)


Materials Needed:
                                1. Base color paint
                                2. Chevron color paint
                                3. Painters tape and brushes
                                4. Level
                                5. Patience :)

The first step was taping out the correct widths...this was fun to do...it took me two tries to get the tape spaced out correctly. You see the first step in painting a chevron is realizing that you have to include the tape width in your measuring. I did 10-inch widths for each of my chevron stripes starting on the bottom and working my way up. This is where the level, laser or old-school, comes in. Make sure your points of each chevron line up vertically from the very beginning (problem on my first attempt).

**Painting Tip** Once you complete all the taping, use the original base color paint and paint over the tape area you are going to paint the new color. This seals the tape line, so that when you remove the tape after painting the new color on you have a crisp line with little touch-ups needed. Amazing time saver!

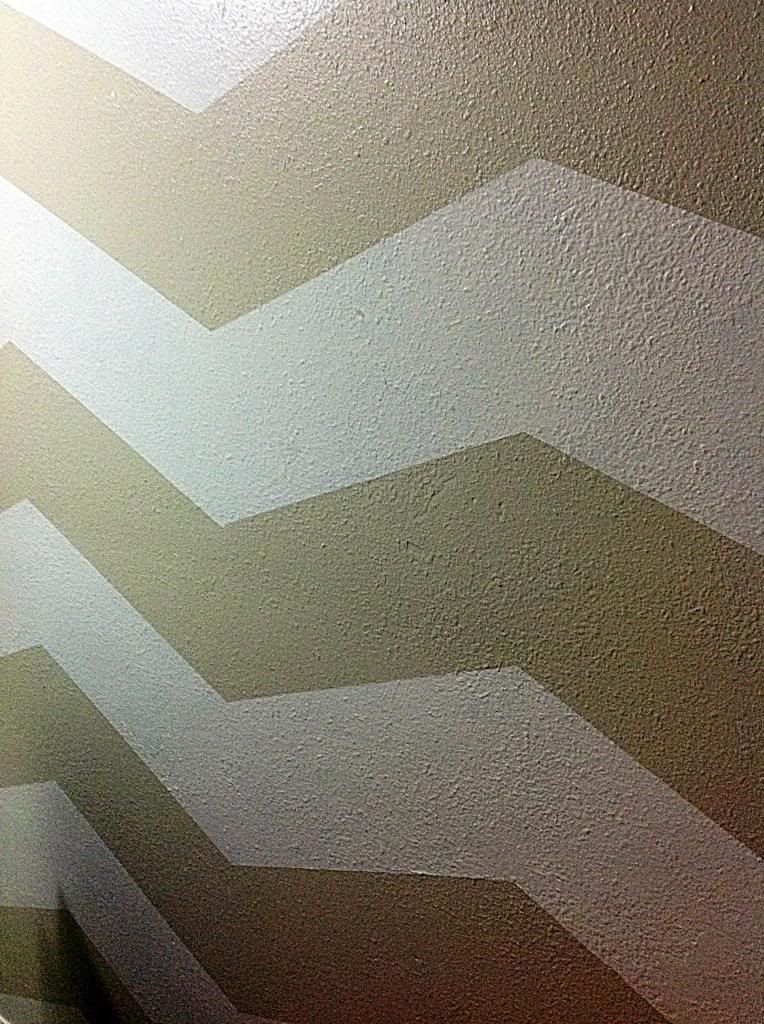
After painting the tape with the base coat, a light tan, I painted the white color in the correct areas. After it dried, I touched up the paint and carefully pealed off the tape. AMAZING. So in love with how this turned out, and how it brightened up our entryway.